Topic 7: Introduction to using Git and GitHub with RStudio
1 Git…? GitHub…?
1.1 What is Git?
Git is a version control system. It helps you:
- Keep track of every change you make to your files
- Go back to older versions if something breaks
- Collaborate with others without overwriting each other’s work
Really, Git is a command line tool. That is, it was originally designed to be used by typing text command into the command line. However, RStudio has some Git integration, that gives us a point and click interface that makes the whole think more friendly.
1.2 What is GitHub?
GitHub is a website that hosts your Git repositories online. It lets you:
- Store your project backups in the cloud
- Share your work or collaborate with others
- Access your code from anywhere
So, in short, if Git is the version control tool, GitHub is like Google Drive for your Git repositories.
1.3 Using Git and GitHub
The following guide will walk you through the process of setting up a repo on GitHub.
The only prerequisite for this is that you have already signed up for a Github account. If you have not already created one, do so now https://github.com/signup.
GitHub is an on-line platform for storing code or other text based projects, in repositories (repos). Each week you will create a new repository for your work in the tutorials. We will go through the process of setting up a repo step by step.
This is the process you should follow every week in your pair programming tutorials. Choose one person who will do this, on their own computer, and work through the steps together. Only do this on that one person’s computer. Don’t worry, all members of the team will get all work at the end, and all individuals will get a chance to do these steps on their own computer in future weeks.
Git has a whole vocabulary of its own. There is a glossary available that you can have open as you work through these notes Git glossary
2 Github
2.1 Creating a new repo in GitHub
- Sign into your GitHub account here https://github.com.
- Navigate to the repositories tab in your GitHub account.

- Click the big green button to create a new repository.
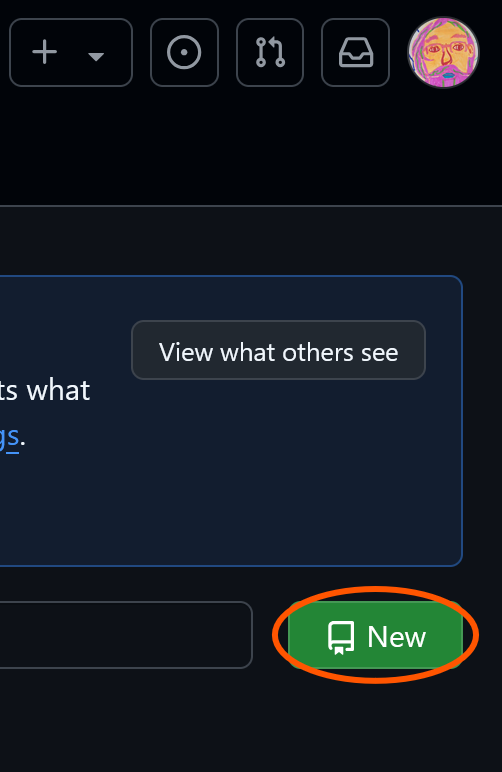
This will take you to the repo initialization page.
2.2 Initializing your repo
You can ignore the “template” section. If you are a keen bean, you can explore this later. It will allow you to create a template repo for all future weeks based on this week’s repo. But we will not go over it here.
- Give your repo a meaningful name.
tutorial-reposounds good, right? 🤨…?
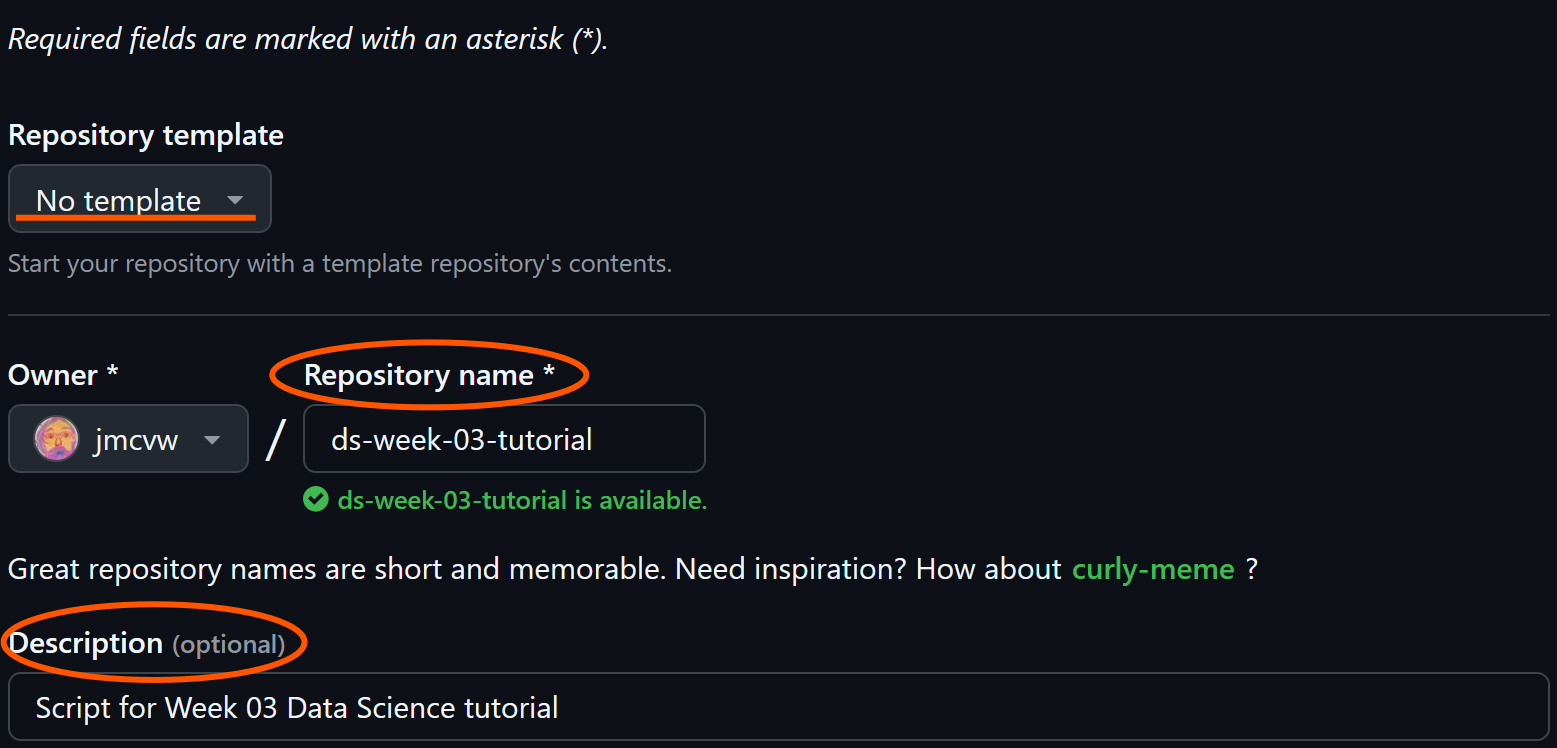
- Also fill in the Description.
- It says “optional”, but fill it in now for benefits later.
- More detail = more benefit.
If we follow the defaults, we will create a completely blank repo. That’s fine, and sometimes may be what you want. But lets make GitHub do some of the tedious bits for us (Figure 4).
- Tick the
add README filebox - click the
add .gitignoredrop-down and find your language of choice (if you need a clue, its R). - We can leave the license as none for now.
- But you should totally consider adding a license for personal projects, and definitely for any future research projects.
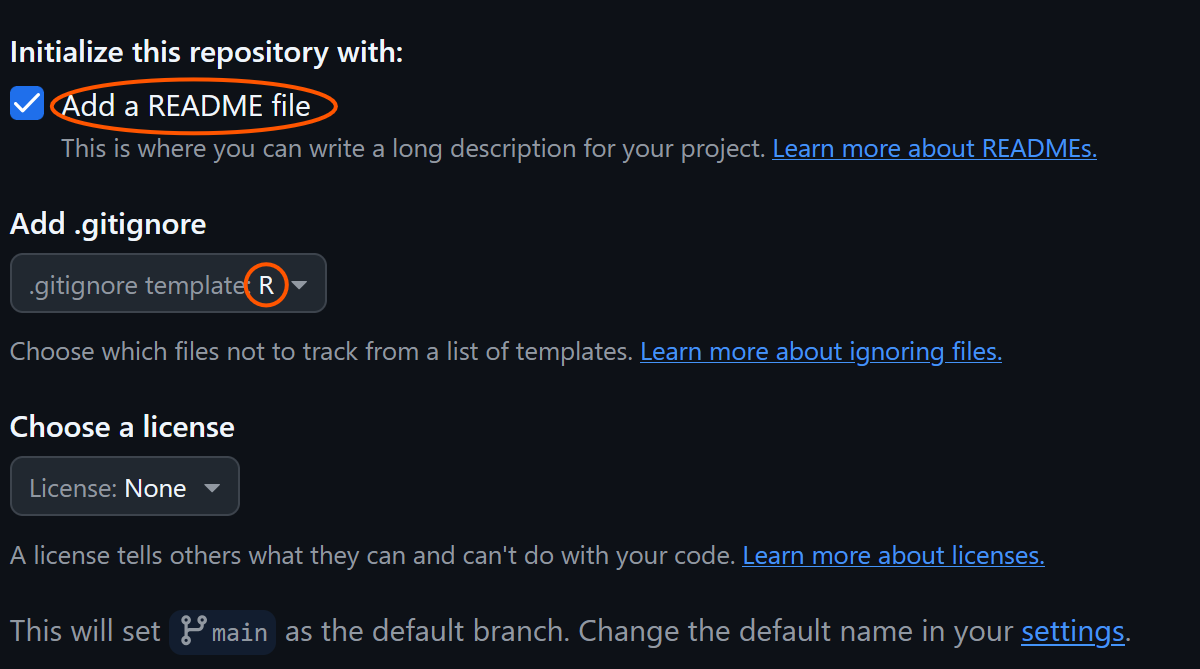
.gitignore file appropriate for R.
And click the big green button at the bottom.

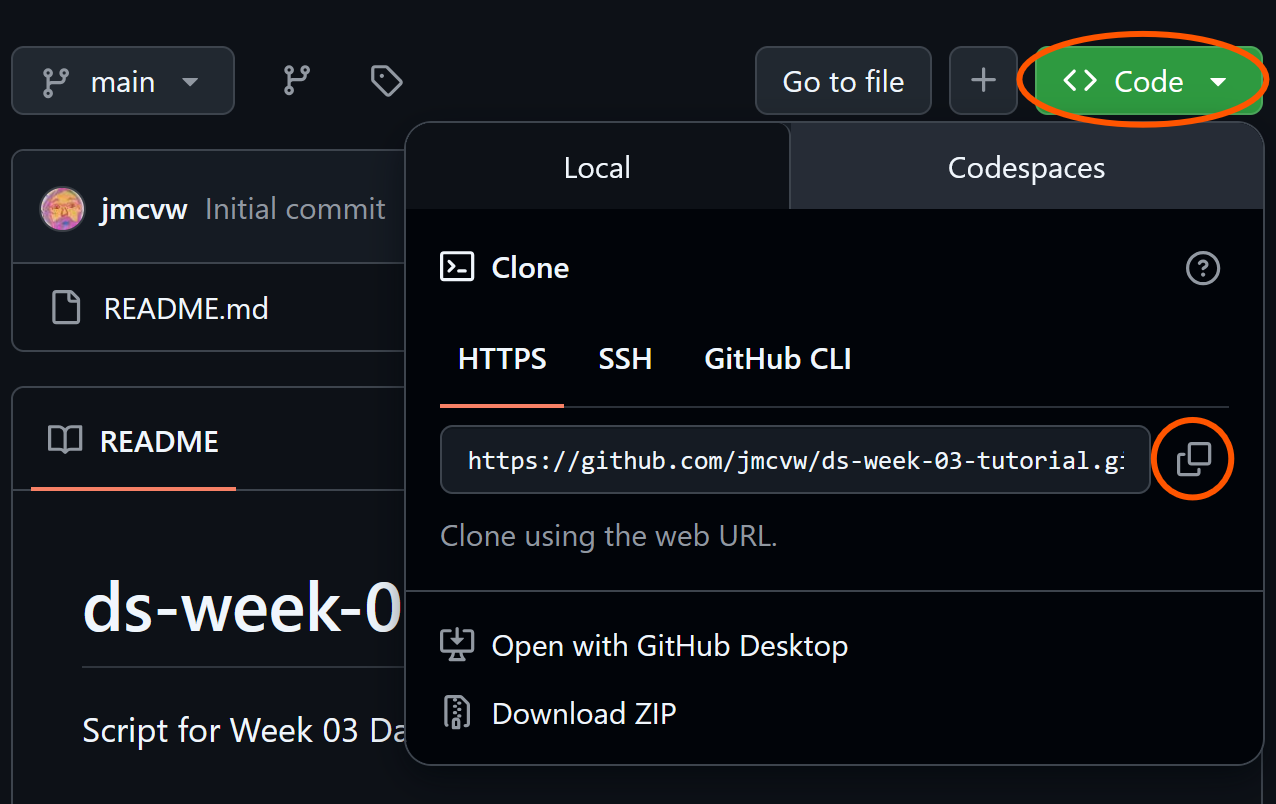
2.3 Preparing to “clone” the repository
After clicking the green button, you will be taken to a new page. This is your new repo. However, it so far is only accessible from GitHub. To make use of it we need to obtain a copy of it on our local machine. the process for doing this is called cloning.
- Locate the next big green button - it says
Code- and click.
- You will see a web URL with a copy icon next to it. Click the copy icon.
3 The terminal 😨
3.1 Don’t panic - only one command
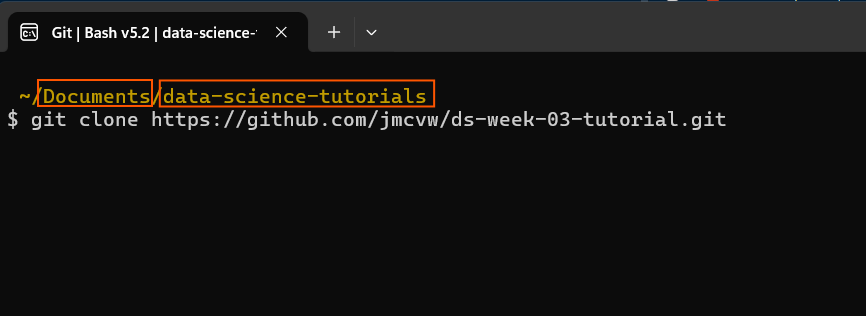
Decide on a good place to save all your course resources. It is up to you where you want these to live, but make sure it makes sense to you, e.g.:
- Desktop = bad
- Somewhere in Documents = better
See Figure 23 at the end for a suggested set-up. You can create a new directory (folder) using whichever file manager you like, e.g. Windows Explorer, Mac Finder, terminal, etc.
- Here I created folder in
Documentscalleddata-science-tutorials. - I then right-clicked inside the folder in Windows explorer and clicked
Open in terminal… - …and pasted the web URL copied from GitHub
Press enter, to perform the clone. Once completed you will be shown a short summary. What it says is not important, but go ahead and read it as an optional exercise; see what you can glean.
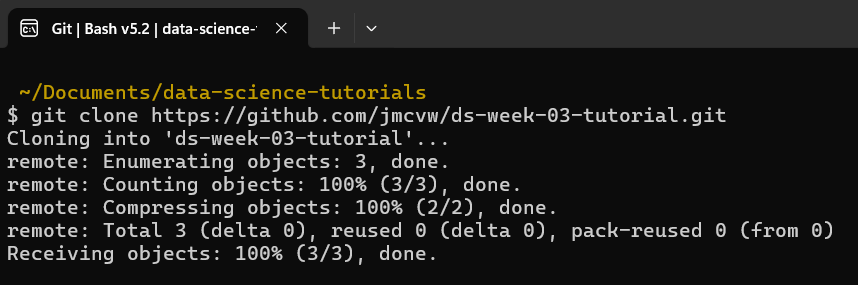
Success! And that’s the only interaction with the terminal we need.
4 RStudio
At this point we now have a repo on the GitHub cloud storage platform.
And we have clone (copied) it to our local computer.
Now we want to write our R code for the repo inside an RStudio project.
This will be mostly familiar, but follow along anyway, because there may be a few points that are slightly different.
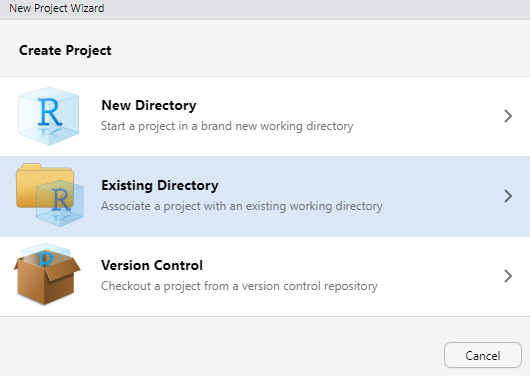
4.1 Setting Up the project in RStudio
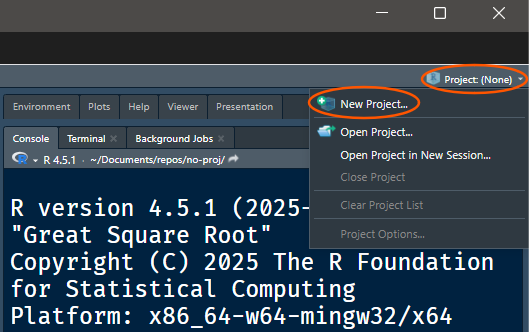
- Create a new project
- Either
File > New project - Or click the
New projectdrop-down Figure 9
- Either
Project drop-down menu can be used for creaing new projects.
- In the menu that opens, select
Existing Directory.
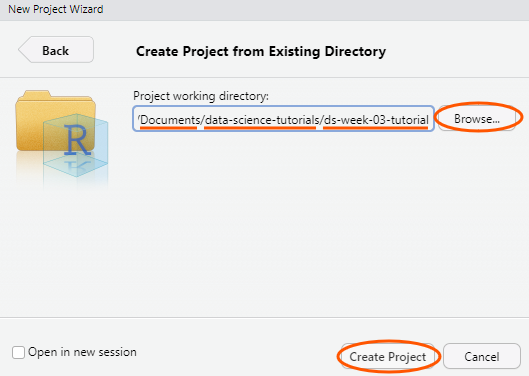
Remember, we cloned our repo somewhere, possibly in Documents/…
- Use the
Browsebutton to find your repo. - When you have found it click
Create Project.
4.2 Check out our new Git tracked R project
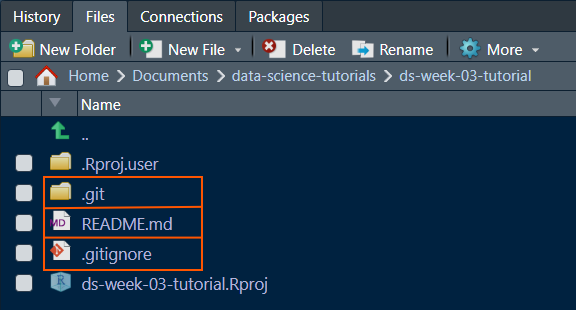
Open the Files pane, and you will see a few things that are different from the usual state of a new project.
- A
.gitfolder- Don’t mess with this!
- If you’re one of the aforementioned keen beans, by all means, have a sniff around it, but know that most mortals have little need to tamper with anything in there.
- A
README.mdfile- This is the readme file from GitHub
- You can edit this if you like - it’s just a text file and it uses markdown syntax
- A
.gitignorefile- We will take a closer look at this shortly.
4.3 RStudio-Git integration
Now that we are using Git with RStudio, we should be able to find a Git pane (Figure 13). By default, I think it appear in the top right panel of Rstudio. It may be somewhere else, so if you don’t see it, check the other panels
The desire outcome here, is:
- Identify which files we want Git to track
- We don not have to track all files.
- Mark them as files of interest
- Called “adding them to the index”.
- This is the point at which Git notices changes to files - it has started tracking them.
- Commit them
- It is only now that changes to those files become part of the permanent recorded history.
One you have found the Git pane, you should see two files listed with some yellow squares ![]() and a check-box next to them.
and a check-box next to them.
This is how we tell Git to track any changes to files. We can choose which files we want Git to track by ticking the check-box.
In this case we do want to track both files, so tick both check-boxes and the ![]() should become green squares with
should become green squares with A inside ![]() .
.
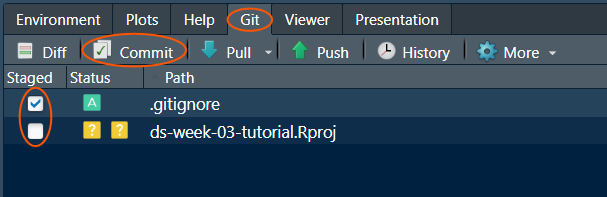
- Then click the
Commitbutton. - Add a commit message
- No need to be laconic here.
- Detail is good. Make it meaningful.
- Click
Commit.
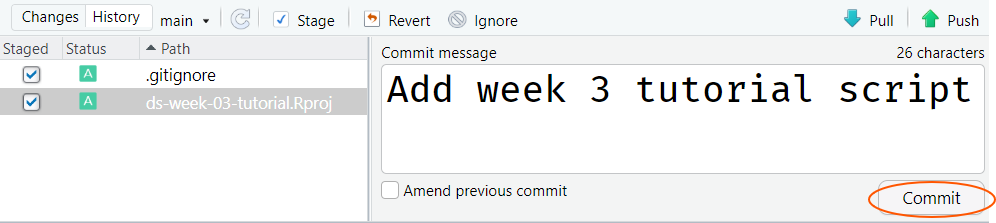
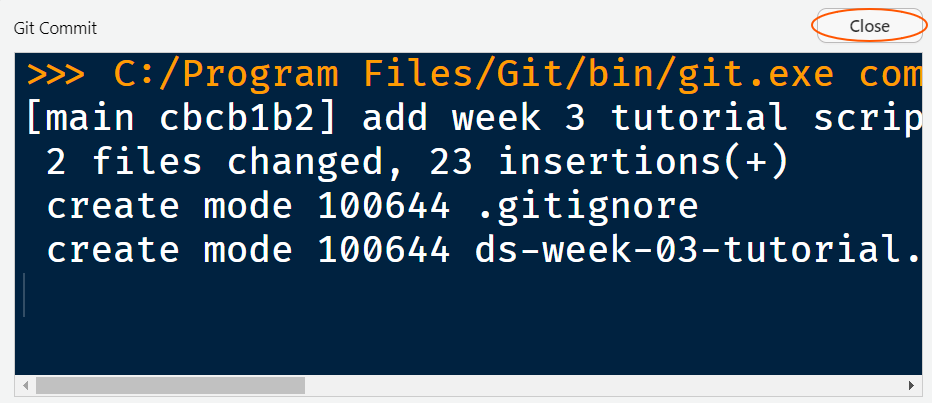
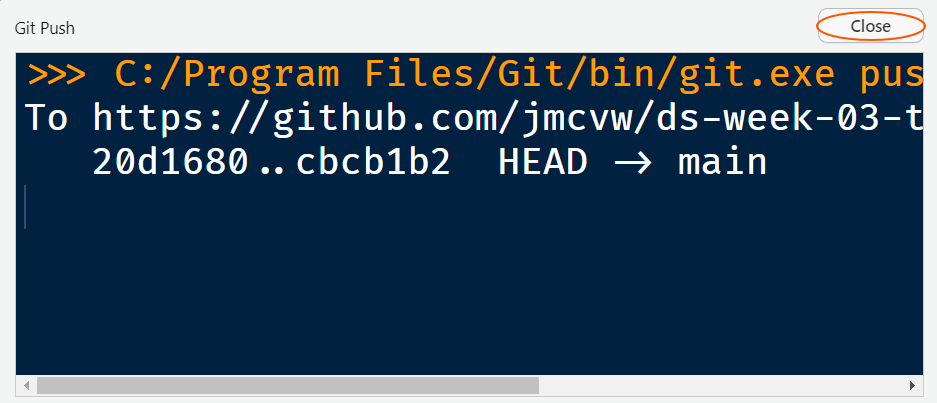
- You will then be given a short summary of the commit
- Click close
- Check out the Git pane again - it should now be empty?
4.4 Let’s change something
- Find the
.gitignorefile in yourFilespane, and click on it. - Add two lines at the end of the file.
.DS_Storethumbs.db
No matter what computer you are using, add both lines. Your .gitignore file should now look like Figure 16
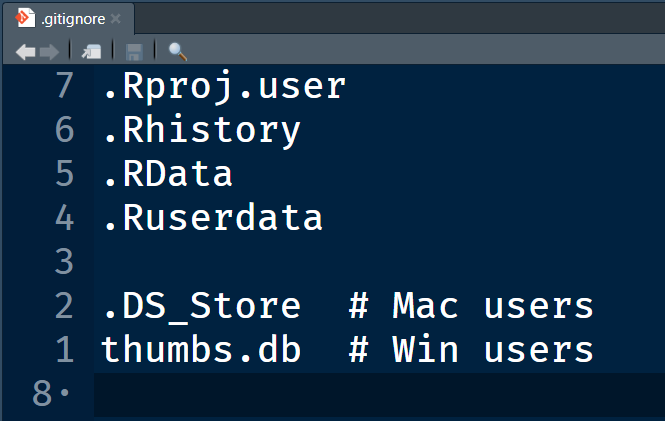
.DS_Store files often crop up in repos. They are Mac only files and they are a nuisance for your repo. Add them to your .gitignore every time. Windows has a similar file (thumbs.db), but it seems to be less pervasive.
4.5 Commit cycle
Once again, take a look at the Git pane. We should see that the .gitignore file has appeared again. This time instead of ![]() , it has a blue square with
, it has a blue square with M inside ![]() inside.
inside.
This is Git saying
You know that file you asked me to track? Well it’s changed
Go through the process again of adding the file, writing a commit message, and committing the changes.
We have just completed the “commit cycle”. This is the most basic and important workflow to learn in Git. Committing is a bit like saving - it’s something you should do often!
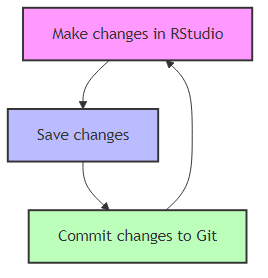
Work > Save > Commit > back to work. And do it often. but note there is one step that we have covered not shown here. Can you remember?
4.6 Push: Lets share our work with the world
Make sure you have committed all changes that you need to make sure your team mates will get the most up to date version. This is the same as Figure 14, but with an extra step: click Push.
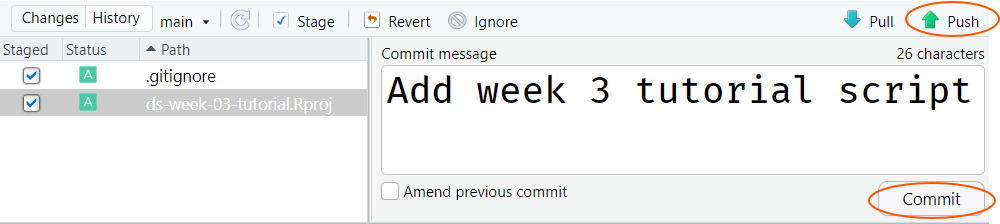
HEAD (your local version) to main the remote version.
But what does that actually do? It sends (pushes) our work to the GitHub cloud platform. And now, because our repos are public, the whole world can access them!
Pushing allows a break from the commit cycle, in that once you push, your work is now backed up remotely, as well as saved locally.

Push step5 Forking: How do I get the work?
Maybe the world doesn’t want our work… But our team mates probably do. The process for getting it is similar to the clone operation we did earlier. With a clone we copy the remote repo to our own machine, and our local copy maintains a “hard link” to the original. This means that if you make any changes locally, when you push, those changes will be sent to the original repo.
An alternative is to create a “fork”. Doing this means we still make a copy of the repo, but instead of copying to our local machine, we can create our own copy in our own GitHub account. We can then clone our own copy of the repo, and any changes we push will update the copy in our own account, instead of the original.
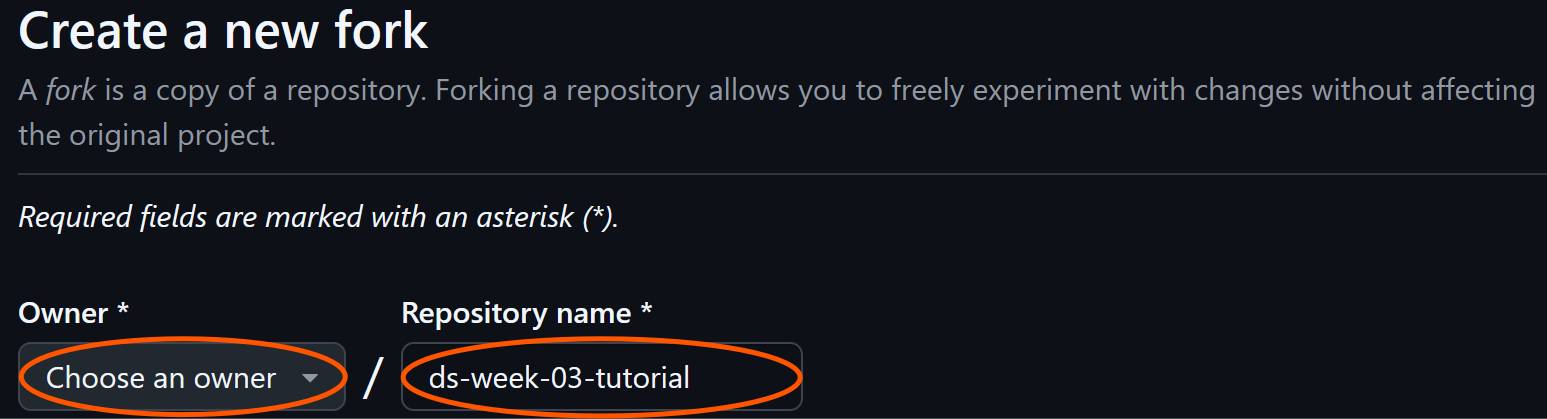
So, to create a fork we navigate to the original repo, and find the fork button. Note that anyone can fork any public repo… you can go and fork the ggplot2 repo if you like!

Clicking the fork button will take us to a screen very similar to the one we saw when we cloned earlier. We need to choose an “owner” and give the fork a name.
- Change the owner to yourself, if it does not already show your name.
- Name your fork
- You can choose any name you like
- The default is to use the same name as the original, which is fine.
Changing the name might be more useful if you are forking a project that you intend to develop in a divergent direction from the original.
Click the green Create fork button at the bottom of the page. There is a checkbox asking if you want to “copy the main branch only”. By default it is ticked. And usually that is what you will want.

5.1 Cloning our fork
Now we have our own copy on our own Github account, to get our own copy of this onto our local machine we do the same clone process as outlined in steps from 2.3 to 3.1
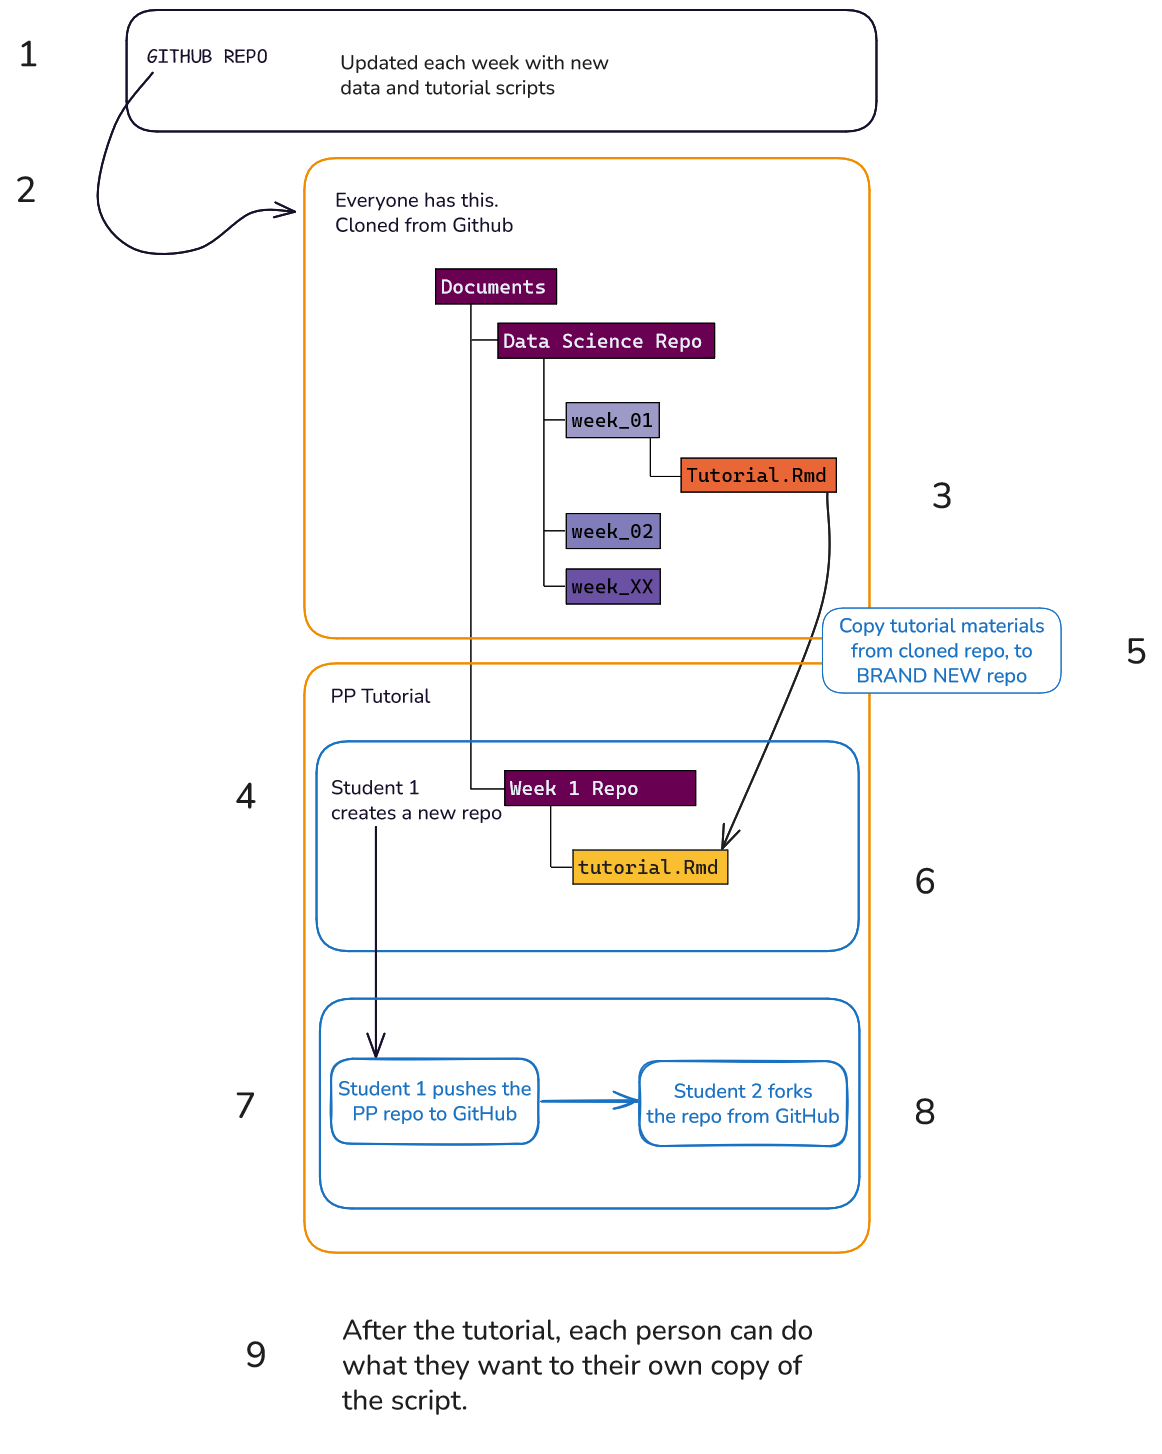
6 Final set-up tips
Here is a suggested directory structure to think about. You do not have to do this, but it is clear, simple, and easy to compare with your team mates.